I am reading this Oreilly book RESTful Java with JAX-RS2.0 from Bill Bourke. I am trying to following the example in Chapter three of how to to deploy a naíve web API that can create/update and get customer information. The book comes with some sample code where you can find from this Github repo. (If you cannot locate the right project, the project should reside in “restful_java_jax-rs_2_0-master/resteasy-jaxrs-3.0.5.Final/examples/oreilly-jaxrs-2.0-workbook/ex03_1″). I tried to run the code in several ways like command line, Eclipse and also tested it out using Junit and tools like postman, I want to list my experience here so others can save some time and get it up and running fast.
There is a README file under the project directory telling you “mvn clean install” is the way to go. Clearly, the author put lots of thoughts into the pom.xml and it will build the war file and deploy the war using jetty maven plugin and run a few unit tests as the client to ensure you can do all the CRUD operations as it supposed to. Here is how the final junit test look like:
 As you can see, it “looks like” the application is working fine, however, after the maven build, it will not keep a server running and you really cannot have a hands-on experience playing around with the app. In that case, we need to deploy the application and keep it running as long as we want. And potentially test it using your own tool set instead that Junit test.
1. Jetty-runner.jar
A few words about jetty if you are new to the whole Java web app thing, like me. Jetty is a web server and servlet container in one sentences, was first created in 1995 and open sourced and has been in sourceforge, codehaus, eclipse and now Github. Instead of diving too much into the installation, integration of how to get a jetty server working, they have a easy version of jetty-runner that packages everything you need into a jar file and you can use it to run java web applications. Here is a more detailed tutorial of how you use jetty-runner. I first went to the target folder of that shop app where there is a ex03_1.war file got generated after the mvn clean install in the previous section. I downloaded the jetty-runner to the target folder so the jar and war file are at the same directory. Then you simply need to run command
java -jar jetty-runner*.jar ex03_1.war
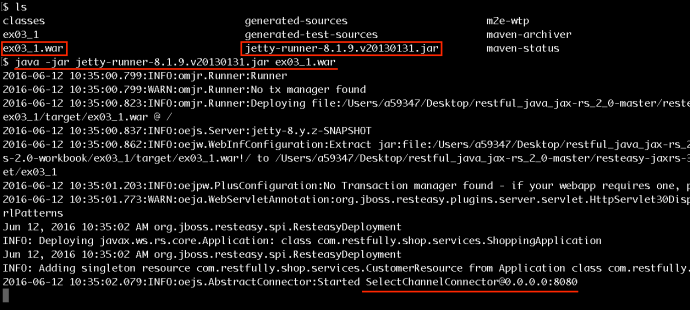
And you should have the web application running on your localhost at port 8080. Now lets test out without using the Junit test.
2. POSTMAN
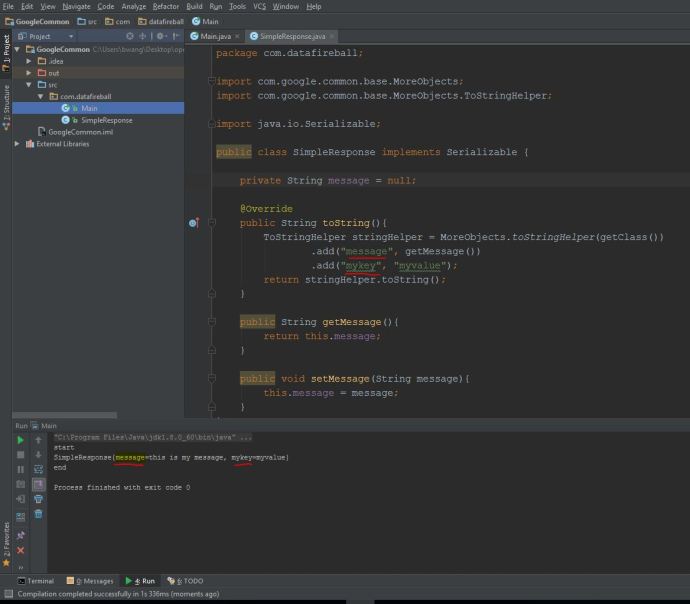
In the idea scenario, I want to use a browser to show you this, however, to make the post command in vanilla browser, you cannot do it AFAIK, however, there are tons of browser extensions you can use and the one that I am going to use today is called postman. First, lets take a quick look at how that junit test created a user.
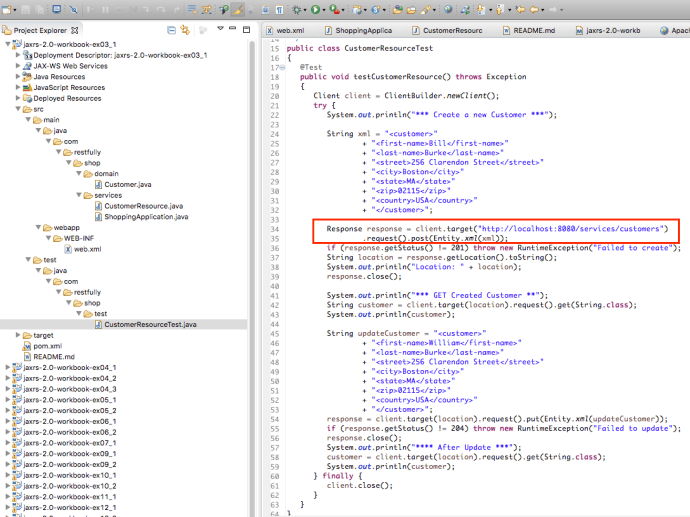
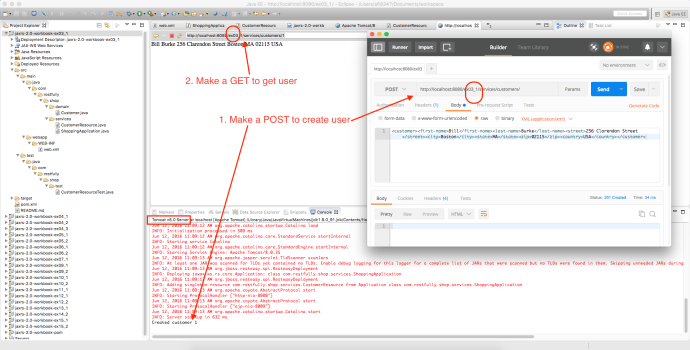
The logic is pretty straightforward, first create a customer in the xml format, and then make a post request to the highlighted URL and you should get the 201 status for successfully creating a user. Now, lets try to do it in our postman.
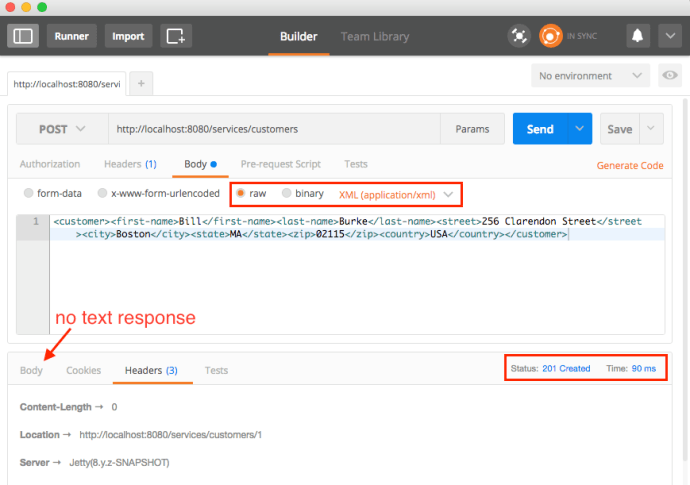
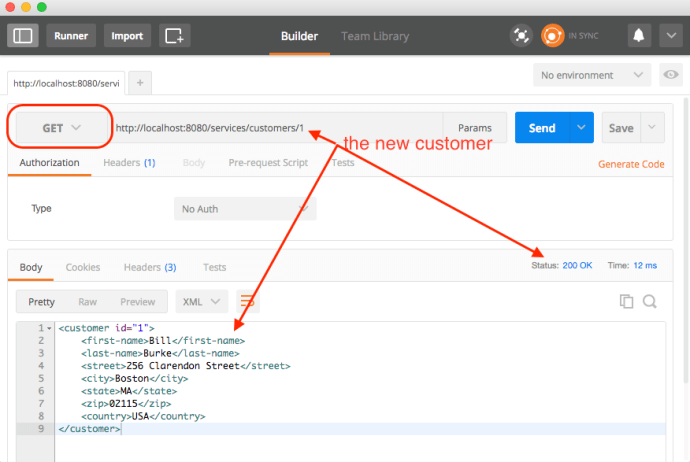
As you can see, when you run jettyrunner, the default behavior is pretty good and the postman also 100% reenforced the fact that our API creation is running properly, here is another screenshot of GET the newly created user.
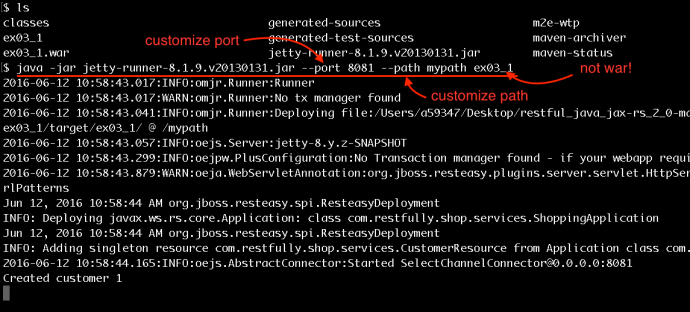
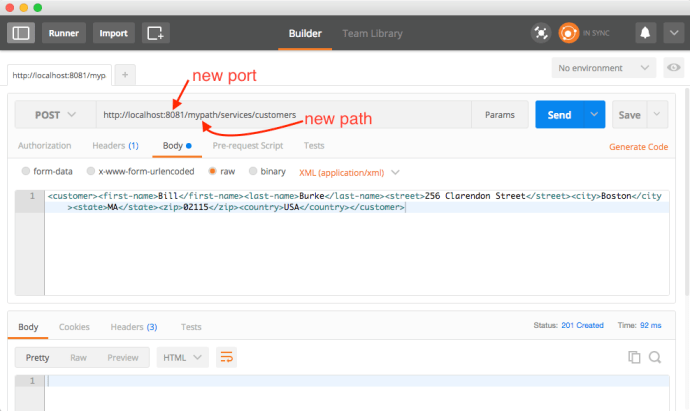
Jetty runner has also some extra arguments for you to customize, here are two screenshots of how I changed the port, the default root path and I am even running it against the folder instead of the war file.
3. Eclipse
IDE like Eclipse or IntellJ is always good to have. It not only gives you a heavy duty text editor, but also provides you with all the development features that a plain text editor lacks. Also, all the features that we described above using Jetty to deploy could be configured as one button click, this makes a few difference when you need to do the same thing 100 times!
In this case, I am planning to learn more about Tomcat, so I download Tomcat and uncompressed it to a folder. Since all the examples in the Github repo are maven projects, you can easily import projects as existing maven projects. Then you simply need to right click the jaxrs-2.0-workbook-ex03_1 projects and “run on server”. Find the right Tomcat version and point to the installation folder and you are good to go.
There is only one thing I did not fully understand is why the URL root turned out to be the project folder name, which is “ex03_01”, if you happen to know the answer, please leave a comment below.