A big problem of many machine learning techniques is the difficulty of interpreting the model and explaining why things are predicted in certain ways. For simple models like linear regression, one can sort of justify using the concepts of slope for every change in x lead to certain amount change in y. Decision Tree can be plotted to explain to users how a leaf got reached based on the split conditions. However, neural network is notoriously difficult to explain and tree based ensembles are also complex, let alone other techniques. Lime is a pretty commonly used technique that is capable of serving some explanations for the prediction given by any model, hence the name, model-agnostic.
The rough idea is that you start with a prediction made by a trained model. The model is supposedly trained by the whole training dataset and capable of recognizing the real underlying pattern, eg. if we assume there are two numerical inputs x1, x2 and one numerical outputs y, the underlying relationship could be a deterministic function that you can visualize in a 3D space y = x1^2 + 3*x2^2. A good supervised machine learning technique is supposed to accurately capture the function from lots of data points and generalize to the mapping shape in its model. When the model is making a prediction, LIME will intelligently generate several data points around the input neighbourhood, if the neighbour is small enough, we should be able to reach a smooth surface and accurately build a model, a linear model to describe the effect of each of the input variables. Once you calculate the gradients, you can interpret the gradient as the partial derivatives with meaningful interpretations like the final prediction score was made up of all the inputs weighted in certain ways.
You can read more about LIME through its Github page, this paper or this blog.
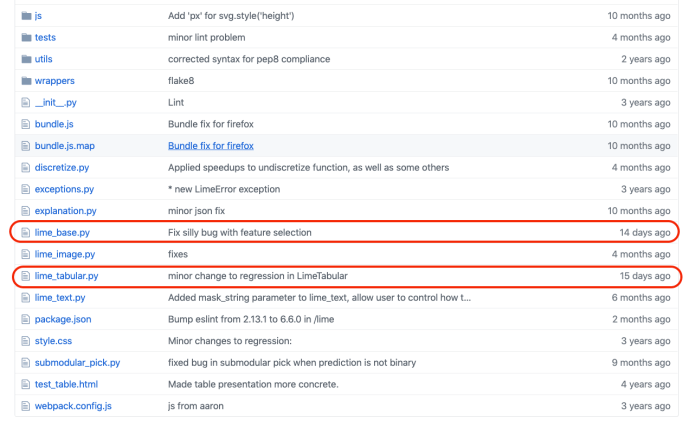
In this blog post, we will dig through its source code and browse through some of the key functions being used in LIME to better understand how the idea got implemented. As we are not looking at any computer vision related machine learning applications, like CNN, we will focus on these two following files which also turned out to be the latest maintained files, lime_base.py and lime_tabular.py.
LIME_BASE
lime_base.py is a very small file that only includes the LimeBase class.
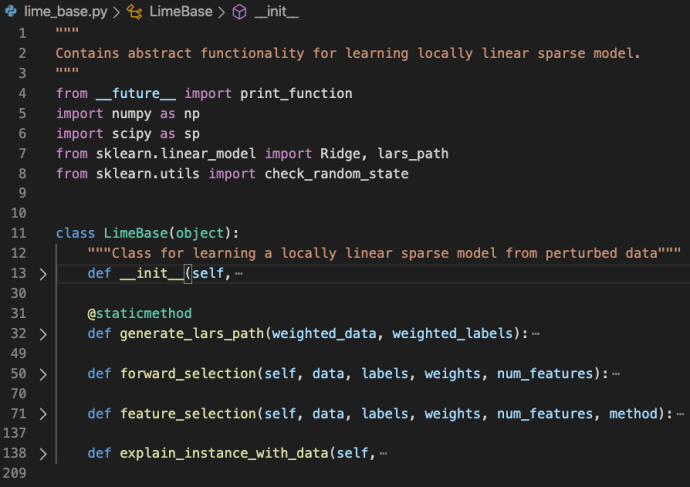
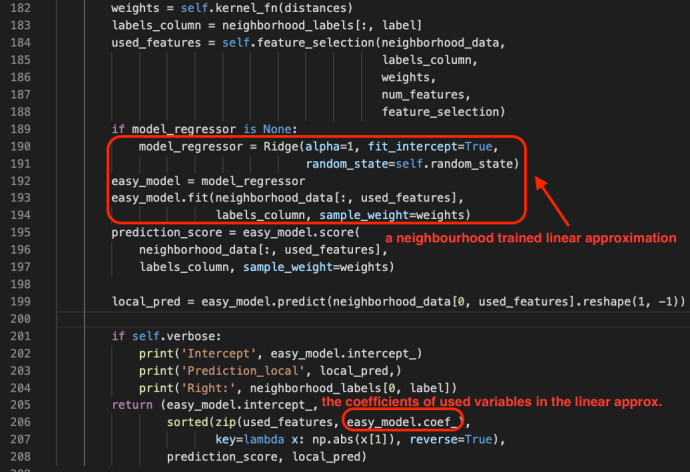
As in the file doc, the lime_base class contains abstract functionality for learning locally linear sparse model. The explain_instance_with_data is the starting point which pretty much captured the gist of the whole LIME package.
One can learn more about Ridge and Lasso in this blog post.
Feature selection is a very important step during this approximation process and it is adopting several different techniques that are well explained in its comments.
feature_selection: how to select num_features. options are:‘forward_selection’: iteratively add features to the model.This is costly when num_features is high‘highest_weights’: selects the features that have the highestproduct of absolute weight * original data point whenlearning with all the features‘lasso_path’: chooses features based on the lasso regularization path‘none’: uses all features, ignores num_features‘auto’: uses forward_selection if num_features <= 6, ‘highest_weights’ otherwise.
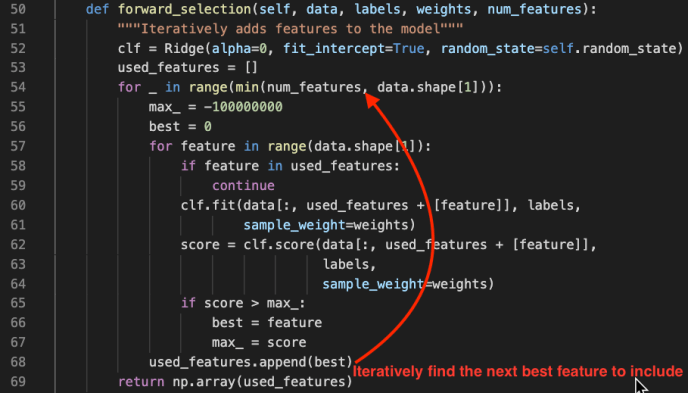
However, understanding feature selection is beyond the scope of this post but I highly recommend you read more about these techniques as it is not only used in LIME but also generalizes to the whole machine learning realm. Here we will only take a glimpse into the forward_selection method is a pretty straight forward feature selection process.